Steps to start application Websphere

In the WebSphere enterprise applications screen, we have the ability to start and stop installed applications. Below is a table explaining the actions that can be performed against one or more selected applications:
Start :- When an application is stopped, you will see an icon which is a green arrow representing a start button. To start, select one or more applications and click on the Start button.
Stop :- When an application is started, you will see a red-cross shape icon representing a stop button. To stop, select one or more applications and click the Stop button.
Install :- As a part of deploying an application, you install application files on a server. Depending on EAR/WAR complexity, the deployment wizard will dynamically produce a guide of steps which requires user input.
Uninstall :- Select applications you wish to uninstall. It is recommended you stop applications first.
Update :- Used to apply delta updates. Only the application code elements that have been changed in the application since last deployment are updated while the application continues running.
Rollout Update :- If an application is deployed across multiple nodes, you can use the Rollout Update option which replaces the application one node at a time. Using this method reduces the amount of time that any single node member is unavailable for service during application deployment.
Remove File :- Deletes a file of the deployed application or module. Remove File deletes a file from the configuration repository and from the filesystem of all the nodes where the file is installed.
Export :- Allows the application to be exported as an EAR file. Can be used to back up an application version.
Export DDL :- By using the Export DDL option, you can export DDL (Data Definition Language) files located within database-aware EJB modules.
Export File :- Allows the exporting of a specific file from an enterprise application or module.
1. We are going to start the default application. Select DefaultApplication and click on the Start action, as shown in the following screenshot:

2. When an application has successfully started, you will get a message similar to the one shown in the following screenshot:
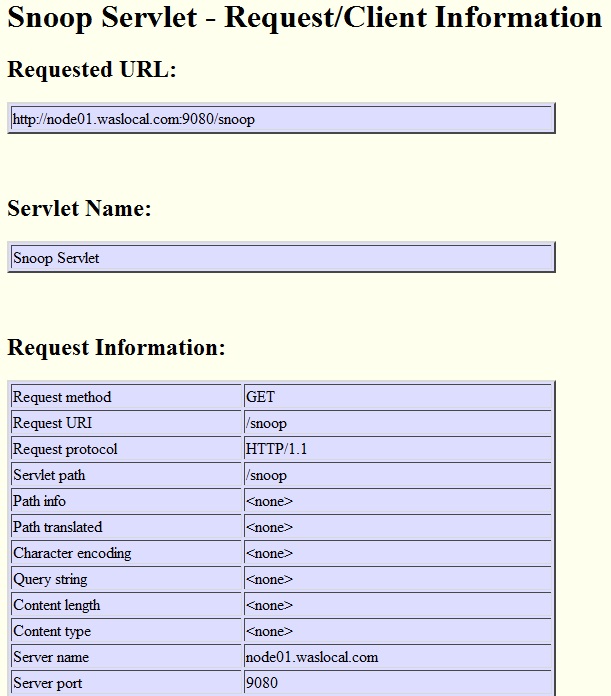
 3. Now that DefaultApplication is started, we can use a web browser to navigate to the URL http://<host_name>:9080/snoop.
4. A page will load, similar to the following screenshot:
The default application contains a very useful administration Servlet called snoop.
The snoop servlet is an excellent tool to use in testing. Snoop reports on the following attributes:
• Servlet context initialization parameters
• URL invocation request parameters
• Preferred client locale
• Context path
• User principal
• Request headers and their values
• Request parameter names and their values
• HTTPS protocol information
• Servlet request attributes and their values
• HTTP session information
• Session attributes and their values
In case of any ©Copyright or missing credits issue please check CopyRights page for faster resolutions.
